Thursday, December 30, 2010

Color & Pattern

My first graders finished up a project incorporating color (primary & secondary) and pattern while experimenting with watercolor paint.

We started by making color wheels & mixing secondary colors with crayon first then followed with watercolor. I took time to demonstrate my painting routines, the properties of watercolor, how to hold a brush and how to rinse/wipe a brush without creating the look of a waterpark on the table. You know - the important stuff..

In the third class, I had a hands-on demo showing them how to create line/shape patterns on paper strips (approx. 1 1/2" x 9") using secondary colors. Students only had access to primary watercolors for this project so they were expected to mix their secondary colors on the paper as they go. I prefer to use the separate pans of color rather than a set - MUCH easier to keep clean! Be sure to demo how they need to write their name & class on the back of strips BEFORE painting.


I gave them 2 full class periods to paint 10 strips while frequently checking for understanding: Are they mixing secondary colors? Are they creating pattern?

The following class, there was a hands-on demo to show the weaving process. We used the tabby weave (under 1 warp, over 1 warp). This reinforces the idea of pattern - "over one, under one, over one, etc". Our first graders have been learning about ABAB patterns in 1st grade math so this was just review for most of them and a way for them to apply what they've learned in their classroom with what we were doing in Art. Classroom teachers were happy they had the extra practice!

Once they had 10 strips painted, I assessed for learning (visible pattern, use of secondary colors) and stapled at one end their choice of 5 strips onto construction paper.


Students weave the other 5 strips between the stapled warp strips. After the weaving is completed, staple the other end of the warp strips to secure the weaving. The finished weavings looked great. For those who didn't complete 10 painted strips in the allotted time (due to absences or slowpoke syndrome), they had to substitute solid color construction paper strips in the secondary colors to experience the weaving process.

Monday, December 27, 2010

My New List of Art Teacher Blogs

The visit to Vivid Layers mentioned in my last blog whetted me appetite to find more blogs to follow. My search criteria was for sites that related to elementary art teachers and their classrooms. I always liked the blog lists featured elsewhere & finally had some time to play around with my site so I could update my look!

You will find my new list of about a hundred art teacher blogs at the bottom of my page. Most are fairly up-to-date. Those that haven't been updated in the past few months will eventually be dropped but I thought they had something to say in past posts that we could learn from! If you have a favorite that isn't listed, please mention it in a comment so I can add it to the others.

My little Christmas present to all my followers & viewers out there...

Sunday, December 26, 2010

Art Blog Directory

I stumbled across this blog directory at Vivid Layers a few weeks ago and finally got around to plowing my way through it! It's a popular site - every time I checked, there were more new additions so I'll have to check back in a week to see what's new.

Another favorite site of mine is the teacher portal for art educators. I discovered some new sites and visited some old favorites.

Now I have a bazillion sites to glean new ideas from!! What a great year ahead...

Saturday, December 25, 2010

Artistic Helping Hands Needed

A local 5th grader has a goal of creating 180,000 Christmas cards - one for every US soldier serving overseas during this next 2011 Christmas season.
Surprise boy making cards for 180,000 troops

Wouldn't this be a great activity for those students of ours who finish work faster than their classmates? If every one of my students created just one card, Stephen would be more than 900 cards closer to his goal!

Can you and your students help him meet his goal?

Monday, December 13, 2010

Collagraphs

Fourth graders are slowly but surely finishing up their collagraphs. It's been a long road but I can see the light at the end of the tunnel now...

Here are a few of the final printing plates along side my favorite print of their series:


These are examples of 'ghost' prints - last in the series & using white ink on printing plates & printed on black paper.


Great examples of the differences between tactile & visual textures, don't you think?!

Drying Rack Class Markers

Sometimes many paintings or other wet media often look alike. Most times, I try to distinguish between classes by color of media or color of paper but when that's not possible, I use 'markers' with class numbers on the shelf racks of my drying rack.


They are made by cutting off the rim of plastic lids. Punch a hole about a 1/2" from the edge and cut a slit to the hole. Label with a sharpie or other permanent marker. I color code mine to match the color of my grade levels (ie: orange - 1st, red - 2nd, etc.).

When I'm not using them, they hang on the back of the drying rack.

Friday, December 10, 2010

Radial Symmetry

I love, love, love radial symmetry! The repetition, the pattern, the symmetry!!!

What better example than mandalas - "its symbolic nature can help one 'to access progressively deeper levels of the unconscious, ultimately assisting the meditator to experience a mystical sense of oneness with the ultimate unity from which the cosmos in all its manifold forms arises.'"

With my 5th graders, we started with a PowerPoint presentation of mandalas and discussion of their meanings.

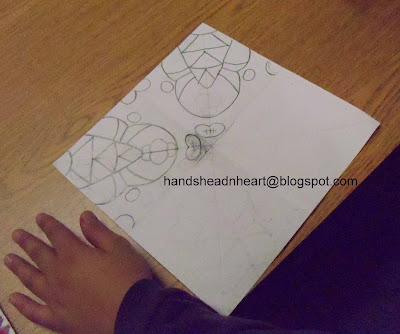
Then we began our drawing on a square of white drawing paper, folded into 8ths. On a 1/8th section draw a simple design of 2 - 3 kinds of line, with 1 - 3 simple shapes. Lines should touch the edge of the space or a shape. Try to avoid small spaces that would be difficult to paint. For older students, you can direct students to choose a specific, simple object. I've done a rainforest theme w/6th graders with the kids choosing an animal/reptile along with plant life. Simple shapes, little detail.

At this point, I have the student check in with me because if they have folded the paper incorrectly, the resulting design will not be an example of radial symmetry.

After the initial drawing, I demonstrate how to refold the paper so that the student can rub the end of the pencil on the back of their drawing and transfer the design onto the next section. They trace the transferred work and continue to rub/transfer and trace until the pattern has repeated all the way around.


Once the drawing is done, there is a hands-on demo of painting procedures. Students begin painting largest area with a hue. Each student in a class has the same hue, with different classes - different hues. Makes it easy to sort & put way work once it's dry.

In successive classes, they begin to add tints, shades & tones of their hue. I add a drop or two of white or black tempera on a small plastic lid and they add the hue. All mixing is (hopefully) done on the lid, leaving the cups of hue at each table unchanged.


Although we aren't quite finished yet, I couldn't resist showing off some of their 'in-progress' paintings.


Sunday, December 5, 2010

Get Art Smart

I was shopping/splurging/salivating at Gardners Book Service yesterday during their annual Teacher Appreciation event and found a new treasure.

It's a new series of 6 books named Get Art Smart, published by Crabtree Publishing just this year. Written at a first and second grade reading level, it includes the titles:

What is Line?
What is Shape?
What is Form?
What is Texture?
What is Color?
What is Space?


I've already used/tweaked/adapted the text from "What is Shape?" with images from the internet to create a Keynote presentation for my classes - my second graders have been highly resistant to identifying the differences between organic and geometric shapes...

Don't you just love discovering new tools/materials to bring something fresh to your lessons?

Thursday, November 25, 2010

A Chicken in Every Pot, A Bucket for Every Table

I'm a big believer in preventative discipline. I've found that most student-to-student altercations happen when those lovely kiddos are out of their seats so I try to limit the need for that.

One way is to provide a wastebasket at each table group. We actually call them 'wastebuckets'. I collect empty 5 gal. wax buckets to use for wastebaskets - cheaper & VERY durable as well as washable! There are usually several left over after the custodians wax the floors every summer. You can also purchase the buckets at your local home improvement store fairly cheap.

With a bucket at each table, there's no need to travel between and around every other table in the room while on the way to the large trash can at the far end of my room. My students often find the need to stop and visit/tease/torment/gossip/distract their classmates on these excursions. It's also less of a thrill to sink that 2 or 3 pointer from a distance of 2 feet vs. 10 feet.

The buckets also come in handy for tie-dye activities or washing out those dusty clay placemats. A bucket with several inches of water in it helps cool down piping hot ceramic pieces that just have to be glazed the same day they come out of a hot kiln. Grab 'em with a long set of metal tongs, dunk them, and they are dry & cool in no time!

One of the best & most valuable uses for the buckets is as a receptacle for a student's stomach contents. Happened to me just this past week - just grabbed a nearby bucket as I went over to help a 2nd grader & kept most of the mess contained. Will have a chat next week with this child about adequate notice for a trip to the nurse's office if the occasion should present itself again at school....

Wednesday, November 24, 2010

A sense of timing

You know how sometimes kids will take FOREVER to do something as basic as drawing a straight line or choosing a piece of colored paper or writing their name or...? Well, in my room I use a 10 second countdown to speed things along.

For instance, this past week we were labeling our printing papers with basic info: first name, last name, class number & registration number. I had already gone over directions & demonstrated info placement on the white board so as soon as students had the necessary ingredients (paper & pencil) I began my countdown. Now between you and me, the countdown is not exactly 10 seconds - just a s-l-o-w ten count.

I also use the countdown when we do our assessment step-by-step drawings. With the added time limit, students quickly make their marks on the paper so as not to fall behind. As they've learned through experience, there will always be sufficient time to go back and make changes later along with the creative touches that make it their own. Most kids need an incentive to get past their fear of seeing that clean, white sheet of paper and put the pedal to the metal...

The countdown gets everyone to focus & get the job done - even my worst ADHD kids! With time so precious in a 45 minute class, why waste time on anything that doesn't require creative thought?!

Another indispensable tool is my timer. It has a magnet on the back so I can stick it to my white board and a clip so I can attach it to my apron if I prefer. I can set minutes or seconds - it counts down and has an annoyingly piercing beep when it goes off. I use it to time cleanup at the end of Open Studio (if tables aren't clean by sound of beep, those students may not attend the rest of the week). Whenever I use it, the room is clean with time to spare.

It is also used to remind me to begin cleanup during those classes when there are several things going on at once. The beep signals me to gather the table helpers for cleanup instructions so class can be dismissed on time.

Nothing like a good sense of timing to keep things on track...

Saturday, November 13, 2010

Collagraphs

Fifth graders are finishing up their printing plates for their collagraphs. Students glued a variety of visual and tactile textures to a backing of tagboard.

I browsed through my storeroom to find stuff: a variety of beans/seeds gleaned from science kits destined for the dumpster, an assortments of lace trims (some purchased from my favorite place: Treasures 4 Teachers), toothpicks, Qtips, dried moss, a collection of cardboard & chipboard pieces, pieces of cord, string & yarn.


Students were given the option of making a 'picture' or a planned design with their materials.


I'm hopeful that the resulting prints will turn out well...

Thursday, November 4, 2010

What's in a Name?

Can there be anything more frustrating than trying to grade a stack of artworks only to find that several have no names? Auugghh!!!

Fortunately, I have a few routines in place that cut down on this immensely!

During the hands-on demo, the first thing I do is demo 'First Name, Last Name + class number' on the back of the work if 2D. In 3rd & 4th grades we have begun our printing plates for collagraphs. The first day of the project they were required to show me their 'ticket' (the back of their base tagboard) before they could dive into the textures on the counter.

For ceramic pieces, everybody creates a 'name tag' (usually a piece of scrap construction paper 2" x 3") with same info that is applied/placed on the base of their clay work for easy identification (again first step of the demo). And again, they have to show me their 'ticket' before receiving their hunk of clay. To help with distinguishing the various classes, each class gets a different color of name tag so when it's time to write names on the ceramic pieces, I have a quick visual reminder of which class I'm dealing with... During the course of the project, we will probably have to make a 2nd name tag due to clay moisture but that's no biggie - I cut extra and keep them in the class drawer. And - yes - I am the one who writes the name on the base of the work!! In my early days/years of teaching, amnesia was a HUGE problem for my students!! Either I couldn't read the writing on the ceramic work or there was no name or no class number. Much time was wasted debating ownership rights...

I'm usually the one passing out the work - I call out names & place on a counter for the student to retrieve while the table helpers get materials to their groups. This way I identify unnamed work soon enough in the project to correct it. Sometimes, if the work is dry media starting with a drawing, it goes straight into the table folders and then into the class drawers. In that case, I need to check for names individually as I circulate the room during class.

Having said all this, there are some pieces that slip through the cracks but usually the number is very small & through the process of elimination, I can figure out who the anonymous artist is.

My worst nightmare came true a few years back when I had a less-than-stellar student teacher. In her haste to grade the work, she dumped out all the work from every table folder for one grade level (5 classes,approx. 7-8 folders per class) into a box to take home. She had been less than diligent checking for names during the course of the project and ended up with about 30 pieces (out of approx. 180) with no names, no class. Unfortunately, she didn't say a word until her last day (a week before grades are due) when she turned in her grade sheets. She casually mentioned 'a few' had no names so were missing grades and I would need to find out whose work was whose.. What a mess! Fortunately, the work was very individualized so students were less likely to mis-identify their work but it still took several days of tracking down the owners...

Saturday, October 30, 2010

Color Wheels

My grades are posted and our school website under control so I now have time to get back to blogging. Hurray!!

My first graders loved making their color wheel chart this week. We used crayons only in the three primary colors to fill in their worksheet and they were AMAZED to find that they could create orange, violet & green. Never get tired of seeing that wonder on their faces!


Last year, I purchased an extra Color Wheel chart from Dick Blick to post in my l-o-n-g narrow art room and splurged on a class set of the smaller personal color wheels for only a few $$ more. Got 'em laminated & use them ALL THE TIME with al my classes for color work.


With these little ones, it was easy for the kiddos to copy & write each color name next to the color - it was right there in front of them on the chart.

Another helpful tool was my ActivBoard. Recently, I attended a PD class on 'Beyond the Basics' with the latest software, ActivInspire. I finally mastered how to 'Annotate the Desktop' so that I can write/color on top of my worksheets which really helps to give directions visually to the whole class.


Here's a PDF of my worksheet if you're interested. Next up - more experimentation with color! Stay tuned...

Sunday, October 3, 2010

Whew!

I knew it had been awhile but didn't realize it has been more than a month since I was last writing a post. Could you tell that September was busy? I signed up to do our school's new website this year (extra duty/extra pay) and the learning curve has been more of a flat line with a slow incline during Sept.

Our state Art Education Conference was held mid-September and yours truly presented the woven pouch lesson to a group of 26 nimble weavers. The highlight of our workshop was the abrupt ending when the connecting/folding wall was hastily pushed back by resort staff and we were instantly part of a wedding reception! We barely made it out of there with our needles, yarn & pouches!!

Then just this past week I was in Boston for 3 days at a PLC conference on common assessments.


Here are some of the row houses in famous Beacon Hill area - great image for a lesson on architecture, don't you think?


Remember the Caldicott-winning children's book, Make Way for Ducklings? Here is the dedication in Boston's Botanical Gardens. I know I will date myself by saying this...but I still remember listening to Captain Kangaroo reading that book on his morning TV show...


Came away with some new ideas for common assessments AND very sore calf muscles. Apparently combining a walking descent of 10 floors in the hotel along with a 6 mile walk on the Freedom Trail to the North End and back to our hotel didn't agree with leg muscles that never walk an incline in our desert city.

Needless to say, I've been a busy lady but have lots to share. Stay tuned...

Tuesday, August 31, 2010

Placecards

We're working on our placecards this week. With over 700 names to learn/remember every year, I've found this helps A LOT!!

I cut up white tagboard into 5" squares and fold in half.


I write the first name of each student. I tried having the kids do it themselves way back when but unfortunately some were illegible or misspelled or didn't fit the card or...

Since we start every year with a quick refresher on line & pattern, they're instructed to create a line pattern on both sides.


I limit marker colors to the lightest colors: yellow, pink & orange. In the past, they had a larger palette to choose from but often chose darker colors which made the name hard to read from across the room. I set my timer for 5 minutes & then put away the markers. They can work on them at another time if need be...

Placecards are kept at the edge of the table, near the middle, with the hope that they are not in the way during class. If a student is playing around with the card during class, I promptly put it away. This cures most of them from using the cards as a distraction...


Table helpers put the cards out when they enter the room at the start of class & put the cards away at the end of class. Cards are stacked with the table helpers name on top of the stack, stacks next to each other in our class drawers.


Although I now use tagboard, originally I used the paper inserts from these boxes for medical supplies.


Not sure what was in the box, but a fellow teacher's wife was a home health nurse & thought maybe I could come up with a use for the leftovers. A match made in heaven until she switched jobs & now I have to order the tagboard to continue the tradition of placecards...

Sunday, August 29, 2010

Extra Activities

My first graders were able to explore all the extra activities available IF they finish their assignments early in class. Give 'em a taste and they'll be more likely to stay on task during projects to get that privilege!


K'nex were a hit! Notice that someone (upper right corner) missed the direction NOT to color or draw in the drawing books! I let out a loud "eeek!" right after snapping the pix & quickly redirected her...


Oil based clay was enjoyed by many - laminated 12 x 18 construction paper keeps the mess off the table.


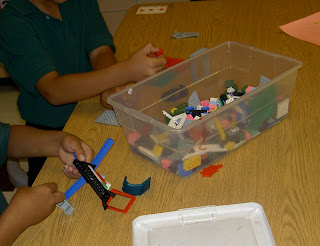
Legos are the most popular!


Here we have the drawing books used the way they were meant to be used...


Someone donated these tanagram pieces - need to get more...


I found these foam shapes at the dollar section in Target. Kids seem to like them...


No drawing books needed here!


A good time was had by all...

More Elementary Art Blogs