Showing posts with label watercolor. Show all posts

Sunday, May 15, 2011

Watercolor Tip

It's that time of year when there are many events that conflict with my schedule - this week most 5th graders are headed up north to the Prescott National Forest for a 3 day stay, next week the PE Field Days are scheduled for K-5 and the usual problems of classes split because of a lack of subs. Of course this means that classes are canceled or shortened so I like to use the few remaining classes to try out new ideas or old, easy favorites.

I thought I would try circle paintings that I had read about on several other blogs. So 1st graders began by using watercolor to paint their circles. During the next class, we'll add more details with oil pastels. They enjoyed having more time to practice their watercolor and painting techniques.


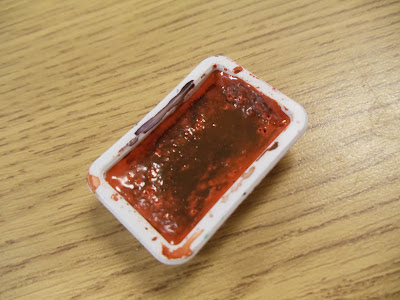
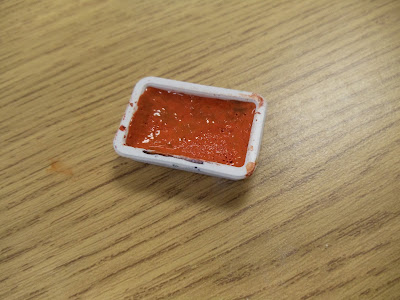
One tip that I've taught them is how to clean the watercolor pans. I prefer to use separate pans of color vs. a watercolor set. My sets would always get nasty-looking after just one or two classes & I find it's much easier to clean individual pans than a set.

Because it's inevitable that some students will mix colors in the pan rather than on the paper (as is always demonstrated), I show my kiddos how to clean up the mess left by someone else.


First, wet the paint with a clean brush...


then tear a small piece of dry paper towel and blot the pan.


Repeat if necessary and Ta Dah!! Clean pan!


I find this teaching/training empowers the kids to take care of problems themselves rather than expecting me to 'fix it'. Now if I could just get those OCD kids to paint instead of spending all their time cleaning the paints...

Monday, March 14, 2011

4th Grade Dragons


On Spring Break here (or as I like to call it - Woo Hoo Week) so of course I had to spend the first day working in my room. Sorting through stacks of graded work for examples that can go in our Spring Art Show, shoveling out *stuff* from the storeroom, going through new 'donations' from a teacher leaving at the end of the year and cutting up cardboard boxes for braiding looms.

I thought you might like to see pix of ceramic dragon rattles we made in 4th grade a few years ago...


These artworks were kept for an end-of-year exhibit that somehow did not get back to their owners. I keep them in a glass display case until they're claimed...


We made the base for these by connecting 2 pinch pots with a few clay beads inside for the 'rattle'. After viewing many examples of dragons from China and other cultures, we added legs, tail, neck & head. Some students went further with wings, spiked tails and multiple heads...


Last step in formation was adding a variety of textures. Color was added with watercolor after the bisque firing. I encouraged pattern when painting to 'jazz it up'!


This year, my 4th graders are creating Storytellers (pictures in few weeks) but I may go back to dragons next year - they always have such great personalities!

Monday, January 24, 2011

Storyteller Dolls Part 2


Sorry for the delay in posting Part 2 but I had inadvertently left my camera at school so had to send someone to retrieve it. Steps are illustrated using Play Doh which has not been in our house for YEARS now so please excuse the poor construction details - ceramic clay is SO much easier to shape and blend....

To build a storyteller, students begin with a slab for the base, a coil/cylinder of clay for torso, smaller coil/cylinders for legs/feet and arms/hands with a sphere for the head. Hair could be painted on later in the process or made of clay - many chose to make braids or buns for the human figures.

Step 1: Use a ball of clay and press it into a small slab for your base. (While students could choose to do a standing figure, none of my 4th graders did it successfully without a base to balance their sculpture).


Step 2: Build a thick cylinder for the torso and attach to base. I use a 'score, slip, press' method for attaching my clay pieces.


Step 3: Make 2 cylinders for legs. Attach to bottom of torso AND base with 'score, slip, press' method. Form ends into feet shapes.


Step 4: Make 2 cylinders for arms. Attach to top edges of torso AND tops of legs where they will rest with 'score, slip, press' method. Form ends into hand shapes.

Step 5: Form a ball for head shape. Attach to top of torso with 'score,slip, press' method. Make sure students then blend the 2 pieces to make a neck transition between pieces so it looks more natural (hard to do with Play Doh...)


Students went on to adding details to their main figure: hairstyle, facial features, clothing, drum, bowl, etc. When ALL details were finished AND assessed by me, they could begin adding the smaller figures.

Smaller figures (children or small animals) were made using small coil/cylinder and ball shapes. Make a short slit at the top and bottom of the coil/cylinder and bend into arms and legs. Attach the ball as the head. Add details.


Attach smaller figures with 'score, slip, press' method in various places on the main figure. Some students were adept at creating clay details for the children but most just used paint to add detail. All my students were expected to have at least one small figure attached for the work to be considered 'finished'. Most had many more than that...


Some students opted to have animal storytellers - so they needed to develop a plan for the major body shapes needed for the figure. Popular main animal figures were bears, turtles, or dogs.

Once again, remember that small figures, whether children or small animals, are made when ALL details on main figure are completed.

When constructing the sculpture it's important to remind the kids that ALL views should be interesting in a 3D artwork.


This was a lengthy project but the kids were very engaged from start to finish. Due to the thickness of some pieces, the artworks were left to dry for 2 weeks before firing. When I labeled the greenware on the final day of completion, I used a 6" weaving needle to pierce the thickest sections (in a hidden area) to enable quicker drying and lessen the chance of explosions during the firing.


Students later added color with watercolor paint - brown for skin areas and limited colors for clothing. Animal figures are painted in realistic colors. I've also seen student work done using only black, white and tan for the color palette.

I think glazes would be more appropriate for older students who have better fine motor skills. I did allow my students the option to add facial features with a fine, black felt-tip marker, which turned out quite well.

I hope to repeat last year's success and will be sure to post pix as we go along this year. Enjoy!

Thursday, December 30, 2010

Color & Pattern

My first graders finished up a project incorporating color (primary & secondary) and pattern while experimenting with watercolor paint.

We started by making color wheels & mixing secondary colors with crayon first then followed with watercolor. I took time to demonstrate my painting routines, the properties of watercolor, how to hold a brush and how to rinse/wipe a brush without creating the look of a waterpark on the table. You know - the important stuff..

In the third class, I had a hands-on demo showing them how to create line/shape patterns on paper strips (approx. 1 1/2" x 9") using secondary colors. Students only had access to primary watercolors for this project so they were expected to mix their secondary colors on the paper as they go. I prefer to use the separate pans of color rather than a set - MUCH easier to keep clean! Be sure to demo how they need to write their name & class on the back of strips BEFORE painting.


I gave them 2 full class periods to paint 10 strips while frequently checking for understanding: Are they mixing secondary colors? Are they creating pattern?

The following class, there was a hands-on demo to show the weaving process. We used the tabby weave (under 1 warp, over 1 warp). This reinforces the idea of pattern - "over one, under one, over one, etc". Our first graders have been learning about ABAB patterns in 1st grade math so this was just review for most of them and a way for them to apply what they've learned in their classroom with what we were doing in Art. Classroom teachers were happy they had the extra practice!

Once they had 10 strips painted, I assessed for learning (visible pattern, use of secondary colors) and stapled at one end their choice of 5 strips onto construction paper.


Students weave the other 5 strips between the stapled warp strips. After the weaving is completed, staple the other end of the warp strips to secure the weaving. The finished weavings looked great. For those who didn't complete 10 painted strips in the allotted time (due to absences or slowpoke syndrome), they had to substitute solid color construction paper strips in the secondary colors to experience the weaving process.

More Elementary Art Blogs