Showing posts with label Storyteller dolls. Show all posts

Sunday, April 17, 2011

Storyteller Progress

Some classes are finished constructing their storyteller sculptures...

A week or two to dry and bisque fire then we can begin to paint. I'm thinking I'll keep them to a limited palette of browns, black, white and maybe turquoise...


And another view...


I think the animal figures have turned out much better than the human figures this year...


but we'll see what happens after the bisque firings...hopefully there will be no explosions or other surprises in store for me!

Monday, March 14, 2011

4th Grade Dragons


On Spring Break here (or as I like to call it - Woo Hoo Week) so of course I had to spend the first day working in my room. Sorting through stacks of graded work for examples that can go in our Spring Art Show, shoveling out *stuff* from the storeroom, going through new 'donations' from a teacher leaving at the end of the year and cutting up cardboard boxes for braiding looms.

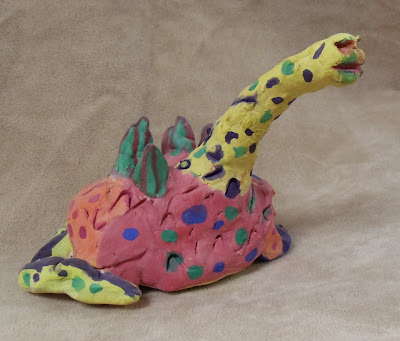
I thought you might like to see pix of ceramic dragon rattles we made in 4th grade a few years ago...


These artworks were kept for an end-of-year exhibit that somehow did not get back to their owners. I keep them in a glass display case until they're claimed...


We made the base for these by connecting 2 pinch pots with a few clay beads inside for the 'rattle'. After viewing many examples of dragons from China and other cultures, we added legs, tail, neck & head. Some students went further with wings, spiked tails and multiple heads...


Last step in formation was adding a variety of textures. Color was added with watercolor after the bisque firing. I encouraged pattern when painting to 'jazz it up'!


This year, my 4th graders are creating Storytellers (pictures in few weeks) but I may go back to dragons next year - they always have such great personalities!

Monday, January 24, 2011

Storyteller Dolls Part 2


Sorry for the delay in posting Part 2 but I had inadvertently left my camera at school so had to send someone to retrieve it. Steps are illustrated using Play Doh which has not been in our house for YEARS now so please excuse the poor construction details - ceramic clay is SO much easier to shape and blend....

To build a storyteller, students begin with a slab for the base, a coil/cylinder of clay for torso, smaller coil/cylinders for legs/feet and arms/hands with a sphere for the head. Hair could be painted on later in the process or made of clay - many chose to make braids or buns for the human figures.

Step 1: Use a ball of clay and press it into a small slab for your base. (While students could choose to do a standing figure, none of my 4th graders did it successfully without a base to balance their sculpture).


Step 2: Build a thick cylinder for the torso and attach to base. I use a 'score, slip, press' method for attaching my clay pieces.


Step 3: Make 2 cylinders for legs. Attach to bottom of torso AND base with 'score, slip, press' method. Form ends into feet shapes.


Step 4: Make 2 cylinders for arms. Attach to top edges of torso AND tops of legs where they will rest with 'score, slip, press' method. Form ends into hand shapes.

Step 5: Form a ball for head shape. Attach to top of torso with 'score,slip, press' method. Make sure students then blend the 2 pieces to make a neck transition between pieces so it looks more natural (hard to do with Play Doh...)


Students went on to adding details to their main figure: hairstyle, facial features, clothing, drum, bowl, etc. When ALL details were finished AND assessed by me, they could begin adding the smaller figures.

Smaller figures (children or small animals) were made using small coil/cylinder and ball shapes. Make a short slit at the top and bottom of the coil/cylinder and bend into arms and legs. Attach the ball as the head. Add details.


Attach smaller figures with 'score, slip, press' method in various places on the main figure. Some students were adept at creating clay details for the children but most just used paint to add detail. All my students were expected to have at least one small figure attached for the work to be considered 'finished'. Most had many more than that...


Some students opted to have animal storytellers - so they needed to develop a plan for the major body shapes needed for the figure. Popular main animal figures were bears, turtles, or dogs.

Once again, remember that small figures, whether children or small animals, are made when ALL details on main figure are completed.

When constructing the sculpture it's important to remind the kids that ALL views should be interesting in a 3D artwork.


This was a lengthy project but the kids were very engaged from start to finish. Due to the thickness of some pieces, the artworks were left to dry for 2 weeks before firing. When I labeled the greenware on the final day of completion, I used a 6" weaving needle to pierce the thickest sections (in a hidden area) to enable quicker drying and lessen the chance of explosions during the firing.


Students later added color with watercolor paint - brown for skin areas and limited colors for clothing. Animal figures are painted in realistic colors. I've also seen student work done using only black, white and tan for the color palette.

I think glazes would be more appropriate for older students who have better fine motor skills. I did allow my students the option to add facial features with a fine, black felt-tip marker, which turned out quite well.

I hope to repeat last year's success and will be sure to post pix as we go along this year. Enjoy!

Friday, January 21, 2011

Storyteller Dolls, Part 1

Since I'm stuck here at home for another week or so, I went back through some photos from last year to get an idea for a new post. I'll be starting clay projects soon after my return and one of my favorites from last year was the storyteller dolls done with 4th graders.

Storytellers are clay figures. Most figures appear to be singing or talking. Often, the main figure has many smaller figures (usually children) listening while sitting on its lap or clinging to it.

In many Native American cultures, stories of the previous generations were passed on orally rather than through a written language. The telling of stories was a way for the elders to teach the young members of a tribe their ways.

Helen Cordero is the most famous Storyteller doll maker. She was born in 1915 at the Cochiti Pueblo in New Mexico. She started making clay figures because making pots was too hard for her.


Today the word “Storyteller” means any figure that is covered with children or baby animals.


Many Storytellers have drums. Drums signify the rhythm of the stories, with each beat making a pattern that can be chanted.


There are often distinct patterns in Storytellers. These designs tell a story, too. Sometimes a motif has a special meaning or is a marking for a specific group or family.


Storyteller artists pass on their special patterns to their children, just like the storytellers pass on their stories.

For our unit, we started out with a Keynote presentation which I developed from the book "Helen Cordero and the Storytellers of Cochiti Pueblo".


Another excellent resource is the book, "Pueblos Stories and Storytellers".


Students learned about the meaning and historical reference of storytellers, the wide variety of storytellers from pueblo to pueblo and the distinct qualities that they shared.


Students learned that storyteller figures could be male or female human forms as well as animal forms.


Some figures were a combination of human and animal.


On the first day of this lesson, in addition to the Keynote presentation, students were given a variety of handouts featuring storytellers and worked with a partner to discern the 'clues' artists gave the viewer.

Male figures usually wore a headband and carried a drum...


while females were often depicted wearing a skirt/dress and carried a bowl for food.


The information learned was used to fill out handouts which they would use to develop their own storyteller doll.

In my next post I'll take you through the step-by-step process of constructing the storyteller...

More Elementary Art Blogs