Wednesday, January 26, 2011

Art Room Visitors

Got a call from my custodian early this morning - my room was one of many rooms broken into overnite at our school. My heart just dropped! I was so concerned about vandalism/destruction/theft.

Fortunately, the extent of damage was only the window they broke to enter my room. 'They' went through my desk drawers, filing cabinets and supply drawers behind my desk. I made a quick trip over lunch to check on everything. Only missing one or two small electronic devices (school purchase) from the desk drawers. So glad I remembered to bring my digital camera home last week!

Obviously, 'they' were not artists - they passed over brand new sets of color sharpies, a beautiful 'Tree of Life' sculpture on loan from a colleague and various artifacts from Polynesian and South American cultures.

Due to the break-in, 3 small windows will be permanently covered by sheet metal - no more tracing on the window...have to think of a creative way to dress that up. Hope your day was less eventful!

Tuesday, January 25, 2011

Kumihimo Braiding


To pass the time here at home & to keep my fingers busy, I'm working on some braiding work. I discovered Kumihomo braiding about 2 or 3 years ago. A project was featured in the book, You Can Weave: Projects for Young Weavers.


I wanted a project that was clean and cheap but that was more than just a craft project. This filled all the qualifications. Materials are simple - cardboard square and yarn. I use a basic 8-strand braid successfully with 4th graders but there are far more intricate patterns that could be used with older students. I recommend the book Braids: 250 patterns from Japan, Peru & Beyond if you are looking for the intricate patterns and a more in-depth text of the braiding practices found around the world. Get a copy quick - it's out of print!


Now, for the historical background: Kumihimo is a method of braiding silk threads developed in Japan. It is traditionally performed on special wooden stands called Maru Dai and Takadai. The literal translation of kumihimo means the "coming together (kumi) of threads (himo)". Kumihimo braids were originally used as ties, cording and belts for clothing, and closures for Samurai armor. The Samurai training and culture included the expectation that the warriors be able to make and mend their own kumihimo cords. The Samurai warrior was able to make a living from his kumihimo skills when his fighting abilities were not in demand.


There are online PDF's to be found on Talzhemir's Kumihimo Page or get a free round marudai template here. Like me, you'll probably develop one of your own based on your students after seeing the variety out there.

There is also a foam version that I purchased at Joann's after seeing one of my students with one - she scored hers at Goodwill at a fraction of the price I paid! You can find it here (on sale right now!) under the name Weave Wheel. Although it is sold as a lanyard maker, it is perfect for kumihimo. I LOVE mine! Of course the cardboard version is much more reasonably priced (FREE) while the foam version is much more durable.


You can use a variety of materials to braid. I use yarn in my classroom for the assignment - the first one is always done with only 2 colors, 4 pieces of a light color and 4 of a darker, contrasting color. Once students are proficient at the process, encourage them to use a variety of thicknesses and colors in their braids.

At home, I usually use embroidery floss. Here are some pix of what we're working on here:


This is one my son (teenager) is working on - he's using the foam loom with 7 black threads and one blue.


Hopefully he won't lose another house key now that he can wear it around his neck!

This is a cardboard (matboard) loom used for a flat braid. I'm making this braid for son #2 in his college colors - Go Mizzou!


If you're interested in specific braiding procedures, send me an email!

Monday, January 24, 2011

Storyteller Dolls Part 2


Sorry for the delay in posting Part 2 but I had inadvertently left my camera at school so had to send someone to retrieve it. Steps are illustrated using Play Doh which has not been in our house for YEARS now so please excuse the poor construction details - ceramic clay is SO much easier to shape and blend....

To build a storyteller, students begin with a slab for the base, a coil/cylinder of clay for torso, smaller coil/cylinders for legs/feet and arms/hands with a sphere for the head. Hair could be painted on later in the process or made of clay - many chose to make braids or buns for the human figures.

Step 1: Use a ball of clay and press it into a small slab for your base. (While students could choose to do a standing figure, none of my 4th graders did it successfully without a base to balance their sculpture).


Step 2: Build a thick cylinder for the torso and attach to base. I use a 'score, slip, press' method for attaching my clay pieces.


Step 3: Make 2 cylinders for legs. Attach to bottom of torso AND base with 'score, slip, press' method. Form ends into feet shapes.


Step 4: Make 2 cylinders for arms. Attach to top edges of torso AND tops of legs where they will rest with 'score, slip, press' method. Form ends into hand shapes.

Step 5: Form a ball for head shape. Attach to top of torso with 'score,slip, press' method. Make sure students then blend the 2 pieces to make a neck transition between pieces so it looks more natural (hard to do with Play Doh...)


Students went on to adding details to their main figure: hairstyle, facial features, clothing, drum, bowl, etc. When ALL details were finished AND assessed by me, they could begin adding the smaller figures.

Smaller figures (children or small animals) were made using small coil/cylinder and ball shapes. Make a short slit at the top and bottom of the coil/cylinder and bend into arms and legs. Attach the ball as the head. Add details.


Attach smaller figures with 'score, slip, press' method in various places on the main figure. Some students were adept at creating clay details for the children but most just used paint to add detail. All my students were expected to have at least one small figure attached for the work to be considered 'finished'. Most had many more than that...


Some students opted to have animal storytellers - so they needed to develop a plan for the major body shapes needed for the figure. Popular main animal figures were bears, turtles, or dogs.

Once again, remember that small figures, whether children or small animals, are made when ALL details on main figure are completed.

When constructing the sculpture it's important to remind the kids that ALL views should be interesting in a 3D artwork.


This was a lengthy project but the kids were very engaged from start to finish. Due to the thickness of some pieces, the artworks were left to dry for 2 weeks before firing. When I labeled the greenware on the final day of completion, I used a 6" weaving needle to pierce the thickest sections (in a hidden area) to enable quicker drying and lessen the chance of explosions during the firing.


Students later added color with watercolor paint - brown for skin areas and limited colors for clothing. Animal figures are painted in realistic colors. I've also seen student work done using only black, white and tan for the color palette.

I think glazes would be more appropriate for older students who have better fine motor skills. I did allow my students the option to add facial features with a fine, black felt-tip marker, which turned out quite well.

I hope to repeat last year's success and will be sure to post pix as we go along this year. Enjoy!

Friday, January 21, 2011

Storyteller Dolls, Part 1

Since I'm stuck here at home for another week or so, I went back through some photos from last year to get an idea for a new post. I'll be starting clay projects soon after my return and one of my favorites from last year was the storyteller dolls done with 4th graders.

Storytellers are clay figures. Most figures appear to be singing or talking. Often, the main figure has many smaller figures (usually children) listening while sitting on its lap or clinging to it.

In many Native American cultures, stories of the previous generations were passed on orally rather than through a written language. The telling of stories was a way for the elders to teach the young members of a tribe their ways.

Helen Cordero is the most famous Storyteller doll maker. She was born in 1915 at the Cochiti Pueblo in New Mexico. She started making clay figures because making pots was too hard for her.


Today the word “Storyteller” means any figure that is covered with children or baby animals.


Many Storytellers have drums. Drums signify the rhythm of the stories, with each beat making a pattern that can be chanted.


There are often distinct patterns in Storytellers. These designs tell a story, too. Sometimes a motif has a special meaning or is a marking for a specific group or family.


Storyteller artists pass on their special patterns to their children, just like the storytellers pass on their stories.

For our unit, we started out with a Keynote presentation which I developed from the book "Helen Cordero and the Storytellers of Cochiti Pueblo".


Another excellent resource is the book, "Pueblos Stories and Storytellers".


Students learned about the meaning and historical reference of storytellers, the wide variety of storytellers from pueblo to pueblo and the distinct qualities that they shared.


Students learned that storyteller figures could be male or female human forms as well as animal forms.


Some figures were a combination of human and animal.


On the first day of this lesson, in addition to the Keynote presentation, students were given a variety of handouts featuring storytellers and worked with a partner to discern the 'clues' artists gave the viewer.

Male figures usually wore a headband and carried a drum...


while females were often depicted wearing a skirt/dress and carried a bowl for food.


The information learned was used to fill out handouts which they would use to develop their own storyteller doll.

In my next post I'll take you through the step-by-step process of constructing the storyteller...

Monday, January 17, 2011

Updated Art Blog Lists

Trying to keep my mind off the surgery I'm having in the morning and stumbled across a blog roll at Art Education 2.0. Just had to explore & find more to add to MY blog roll...We're up to one hundred and SEVENTEEN! If I've missed yours - leave me a comment!
Sunday, January 16, 2011

Letters

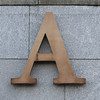
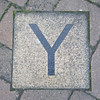
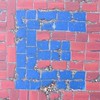
letter N Block Letter A N letter C Cast Iron Capital Letter I (North Scituate, RI) E Caslon metal type letter k letter A letter Y

Just visited the blog KB Konnected to play with letters! This was SO much fun...but of course it was done in the name of science. Have to make sure everything is on the up and up before allowing students to...Oh what the heck - we can have fun too, right?!

Simplify Tempera Paint

In my blog browsing recently, many bloggers have mentioned how they prefer tempera cakes over the liquid form. I've used the cakes before but MUCH prefer to use the liquid - here's why...

For me, liquid tempera provides a more visceral experience during direct painting projects. Pushing around the thick paint has a very different 'feel' than paint in solid form with water added.

In most cases, I prefer my students mix colors directly on the paper so they get all the nuances between mixed hues. In a current 2nd grade project based on George Rodrique's Blue Dog, my kids are mixing warm colors for the background to contrast with the cool colors of the dog.


I've developed a storage routine that minimizes waste while saving time.

I prefer to use clear plastic trays that were donated to my room (but I've also used soda/pop cardboard trays or copy paper box lids) along with small plastic cups purchased at Costco.


Trays are set up before class with brushes, paint cups and water containers.


After class, paint cups are put into one tray and are 'refreshed' - messy/mixed up cups are cleaned (lay a piece of dry paper towel on surface and lift off) and more paint added to be ready for the next time we paint.


Next - a plastic bag. I have 2 boxes of these T-bags I got for free at Treasures 4 Teachers last fall - but any plastic bag will work...


Put the tray in the bag and fold the extra under. I store the bagged trays in my project drawers between classes.


The paints will stay moist for a l-o-n-g time - when we returned from Christmas break, paints were still good to go! Sometimes I will spritz a light mist of water with my spray bottle before wrapping up the bag...

What tricks do you use to stretch your materials?

Friday, January 14, 2011

Texture Rubbings

My first graders have started crayon texture rubbings and are thrilled with their work so far...


Instruction began with a discussion of the differences between visual texture -
the patterns you see on the laminated 'wood' texture of our tables
the patterns you see on the ceiling tiles
the patterns you see on the sole of your shoe

and tactile textures - how something feels on your fingertips, like
your hair
your clothing
the sole of your shoe

Then we move to the demo table for a demonstration on using tactile textures of a variety of materials to create visual textures.


They use construction paper crayons on different colors of construction paper cut to 3"x 4 1/2"size. Each student is instructed to use 2 textures and 2 colors on 6 different papers.


We'll use these papers later to assemble a collage creating an imaginary animal in its environment in the weeks to come...stay tuned for pictures of completed artwork at the end of the month...

More Elementary Art Blogs