Showing posts with label You Can Weave: Projects for Young Weavers. Show all posts

Tuesday, May 17, 2011

Weaving in the Artroom - No Muss, No Fuss!

Third grade has started on their woven pouches and I'm a-hoping and a-praying that we can finish before the last day of school. Here are some pix of finished pouches from last spring...


The looms were cut and labeled...


warped and folded...


and some have started to weave....


Students will use yarn for their weft and yarn needles to speed the weaving along.
The safety rules for the needles are:

1. If you use it like a weapon (even pretending) it's a quick trip to the office & you will have to weave only w/your fingers.

2. I put the needles on the table, I pick them up at the end of class.

3. Do not walk w/needle in hand - tuck it in the pouch if you need to get up to show me your work.

Of course, I count the needles back in at the end of every class which reduces the chance that any needles 'walk' out the door! I ask the students to limit their colors of yarn to 5 - this ensures that even if we run out of one or two of their colors, there are still other possibilities. I pre-cut the yarns into approx. 30"-36" lengths to save time - I wrap several colors of yarn around the end of one of my 3' wide tables and then cut...

Here's hoping we finish before our last day on June 2nd...

Friday, May 6, 2011

Kumihimo: The art of Japanese Braiding

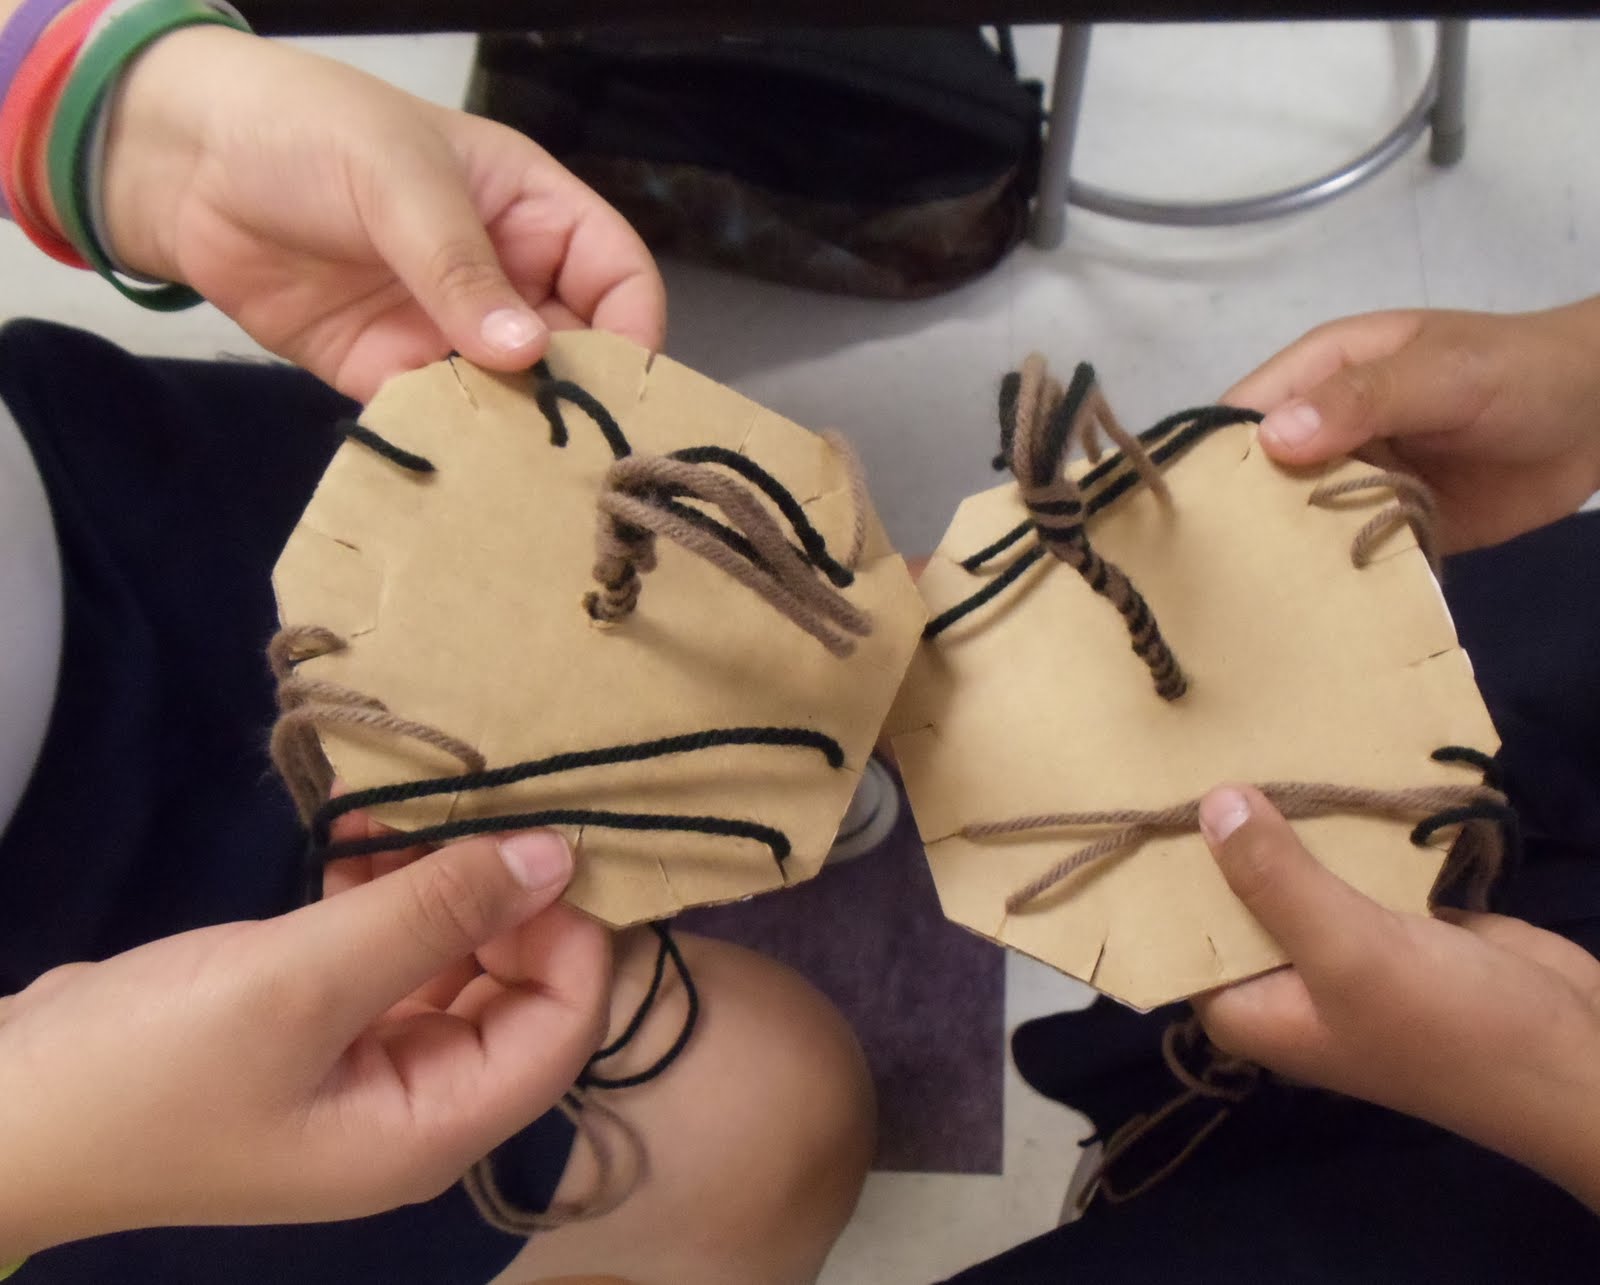
Fourth graders have made their maru dai braiding looms and started their first braid. If you haven't heard of this artform before, check out a previous post of mine for background and details.


Students watched a Keynote presentation giving the history of Japanese braiding - Samurai warriors were proficient at creating kumihimo braiding which secured their armor for battle. When not at war, they made and sold their braids to support themselves and their families.

My students made a loom from cardboard and warped it using 8 pieces of yarn - 4 pieces of a light color and 4 pieces of a dark color. To simplify things for me, each 4th grade class uses a different 2-color scheme - easy for me to identify which class the work belongs to if the name tag gets lost.


Most caught on to the rhythm of the pattern quickly,


others will take longer...

Fortunately, those who finish quickly can move on to a second braiding using any color combination so I'm free to give one-on-one help to those who need it most.

Tuesday, January 25, 2011

Kumihimo Braiding


To pass the time here at home & to keep my fingers busy, I'm working on some braiding work. I discovered Kumihomo braiding about 2 or 3 years ago. A project was featured in the book, You Can Weave: Projects for Young Weavers.


I wanted a project that was clean and cheap but that was more than just a craft project. This filled all the qualifications. Materials are simple - cardboard square and yarn. I use a basic 8-strand braid successfully with 4th graders but there are far more intricate patterns that could be used with older students. I recommend the book Braids: 250 patterns from Japan, Peru & Beyond if you are looking for the intricate patterns and a more in-depth text of the braiding practices found around the world. Get a copy quick - it's out of print!


Now, for the historical background: Kumihimo is a method of braiding silk threads developed in Japan. It is traditionally performed on special wooden stands called Maru Dai and Takadai. The literal translation of kumihimo means the "coming together (kumi) of threads (himo)". Kumihimo braids were originally used as ties, cording and belts for clothing, and closures for Samurai armor. The Samurai training and culture included the expectation that the warriors be able to make and mend their own kumihimo cords. The Samurai warrior was able to make a living from his kumihimo skills when his fighting abilities were not in demand.


There are online PDF's to be found on Talzhemir's Kumihimo Page or get a free round marudai template here. Like me, you'll probably develop one of your own based on your students after seeing the variety out there.

There is also a foam version that I purchased at Joann's after seeing one of my students with one - she scored hers at Goodwill at a fraction of the price I paid! You can find it here (on sale right now!) under the name Weave Wheel. Although it is sold as a lanyard maker, it is perfect for kumihimo. I LOVE mine! Of course the cardboard version is much more reasonably priced (FREE) while the foam version is much more durable.


You can use a variety of materials to braid. I use yarn in my classroom for the assignment - the first one is always done with only 2 colors, 4 pieces of a light color and 4 of a darker, contrasting color. Once students are proficient at the process, encourage them to use a variety of thicknesses and colors in their braids.

At home, I usually use embroidery floss. Here are some pix of what we're working on here:


This is one my son (teenager) is working on - he's using the foam loom with 7 black threads and one blue.


Hopefully he won't lose another house key now that he can wear it around his neck!

This is a cardboard (matboard) loom used for a flat braid. I'm making this braid for son #2 in his college colors - Go Mizzou!


If you're interested in specific braiding procedures, send me an email!

Monday, May 17, 2010

Woven Pouch

My third graders are beginning to complete their woven pouches. Thought you’d want to see some pix. The students chose a limited palette of 5 colors of yarn. It’s always fascinating to see how the color combinations they choose match their personalities!


The lesson was adapted from the book You Can Weave! Projects for Young Weavers written by Kathleen Monaghan and Hermon Joyner. We used the cardboard from cereal boxes to build our looms.


I have found that using a template to guide the cutting of warp spacing for the loom saves a lot of time. I used to be a purist & taught them how to use a ruler to measure the spaces. I stopped doing that when I realized we were using an entire 45 min. period just for measuring!

I color code the templates so each class has a different color - keeps me from mixing them up! Another tip I use to help speed things along is to pre-cut the yarn into 24” lengths. They really enjoyed using some of the variegated yarns I borrowed from the 4th grade braiding projects.

I’ll be teaching the woven pouch project at our state conference this fall so it’s nice to have these great examples…If you’d like the lesson plan, email me & when I write it up this summer, I’ll send you a copy!

More Elementary Art Blogs