Showing posts with label shape. Show all posts

Tuesday, October 30, 2012

2nd graders discover Jasper Johns


My second graders are finishing up their tempera paintings that were inspired by Jasper Johns (and my good buddy Barb!). The lesson began with a short presentation and discussion of Johns paintings that used numbers and letters as symbols.

Our first step was to draw numbers or letters in pencil that had meaning for each student. Tempera was painted over each symbol - each 2nd grade class (I have 4 groups) painted this step with the same color so it would be easy for me to sort later if the work was not labeled correctly by the student.

Each painted symbol was outlined in another color - student's choice!


The background was done by painting a variety of tints...


We were inspired by the words of Johns to "do something, do something to that and then do something to that" so we continued to add details of shape and line to add interest.


I'm so proud of their efforts!

Friday, September 28, 2012


It's been a busy week... Shape Man with kinder and 1st...
Jasper Johns-inspired painting with symbols underway...
Jean Dubuffet self-portraits in the home stretch...
Zentangles with 4th graders coming along nicely...
a few 5th graders finished with their Op Art/value studies inspired by a lesson from Mr. E's blog...
One more week (parent conferences week) then Fall Break - Woo Hoo!!

Sunday, April 29, 2012

Drawing Birthday Cakes

Last week was state testing week in AZ, and many special area classes were canceled. The few classes I did see were pretty tightly wound after sitting for hours at a time so we did some step-by-step drawings to get the creative juices flowing again... I dusted off one of my favorite drawing books by Mark Kistler and was inspired by his 'cake'.
The steps were simple, using an oval with straight and curved lines.
After completing a 3 tier cake, the kids added birthday candles. I took a few minutes to draw possibilities of how to decorate the cake to get them started - found a lot of examples online to get me inspired!
Then they were off and drawing, adding their own unique touches...
I encouraged them to fill the foreground with items you might see on the table next to the cake...
Color was added with colored pencil.
Not long after completing these, I received an email requesting food related artwork. The Food Services Department at district wanted work they could display. What perfect timing! So a few will be framed and hung in our district food services offices soon...

Wednesday, January 18, 2012

3 Little Kittens (Painting Practice with Kinders)

Thanks to a colleague, I have an easy lesson for introducing/practicing painting procedures to kinders and first graders. Using white tempera, we paint simple shapes (oval, triangle) along with line (straight, curve) to create 3 cats/kittens.


Begin with a small and large (relatively) ovals.


Next add 2 small triangles and one curve line.


Finish with 2 short, straight lines for legs.


For the second cat, angle the large oval diagonally.


Add the ears & tail.


Then finish with lines for legs.


The third cat starts like the first but add 'standing legs' with angle lines.


The kids had a blast! We took a little time at the end of the lesson to add a second coat of white paint. Each class used a different color of 4 1/2" x 6" dark construction paper to help sort the classwork...

In the next class, we'll read the nursery rhyme "3 Little Kittens" and add details with construction paper crayons. Stay tuned...

Sunday, November 20, 2011

Vocabulary review

With a 2-day week ahead (WOO HOO!), I hesitate to start new projects so we'll be doing assessments and playing vocabulary review card games.


The card games are basic memory games - spread out the cards face down, turn over 2 cards at a time to find a match.

I use Avery labels to print out words and definitions for the upper grade students. The K-2 student cards rely more on examples of color, shape or line along with matching words.


It's amazing how the vocabulary just flows out during the game! I have a set for each table group to use.


The labels are placed on recycled printed cardstock I bought by the sack-load at Treasures 4 Teachers...about time for another drive over there since I'm running low on supplies now that I have 7 sets featuring mola/shape, landscape and color vocab for the current projects.

Saturday, April 9, 2011

Directed Drawings

Another activity I did this past week while waiting for the ceramic firings to get done was a directed drawing with my second graders. I have many step-by-step drawing books so it's easy to find something the kids will enjoy...

For this drawing, I chose a clown from this book:


Here are the steps-


I always draw the steps on the whiteboard or ActivBoard, followed by drawing the same step on a sheet of paper the same size as the student's - so hopefully they can get the placement and proportion more easily.


As I'm drawing, I simplify every direction to straight line or curve line or angle line or a specific shape. I let the drawing reveal itself as we go along...


I keep each step limited to just a few lines and do a 10 sec. countdown to keep them focused...everybody has to start & stop at the same time - no erasers allowed until we're finished.


Some might think this stifles their creativity but I've found that it eliminates the fear of that blank white sheet of paper. My goal is to have them 'put the pencil to the paper' (my take on 'putting the pedal to the metal'). They are focused and - best of all - they are DRAWING!


The finishing touch is always the groundline...


To finish off, we have a discussion & demo of possible changes to clothing, hair, etc. We also talk about where we usually see clowns - they offer "the circus" "the mall" "a birthday party" "a parade" which gets them off & running for drawing details in the background and foreground. Erasers are then passed out with the caution that erasers are for little changes - starting over can be done by simply turning the paper over. This helps prevent the complete erasure of all work & no time left to begin again.

While the majority of students move on eagerly, some now need individual help. During the drawing process, I keep my eye on those who are struggling. I bring these kids over and draw side by side the same steps. Usually they are much more successful & still have time to add their own details.

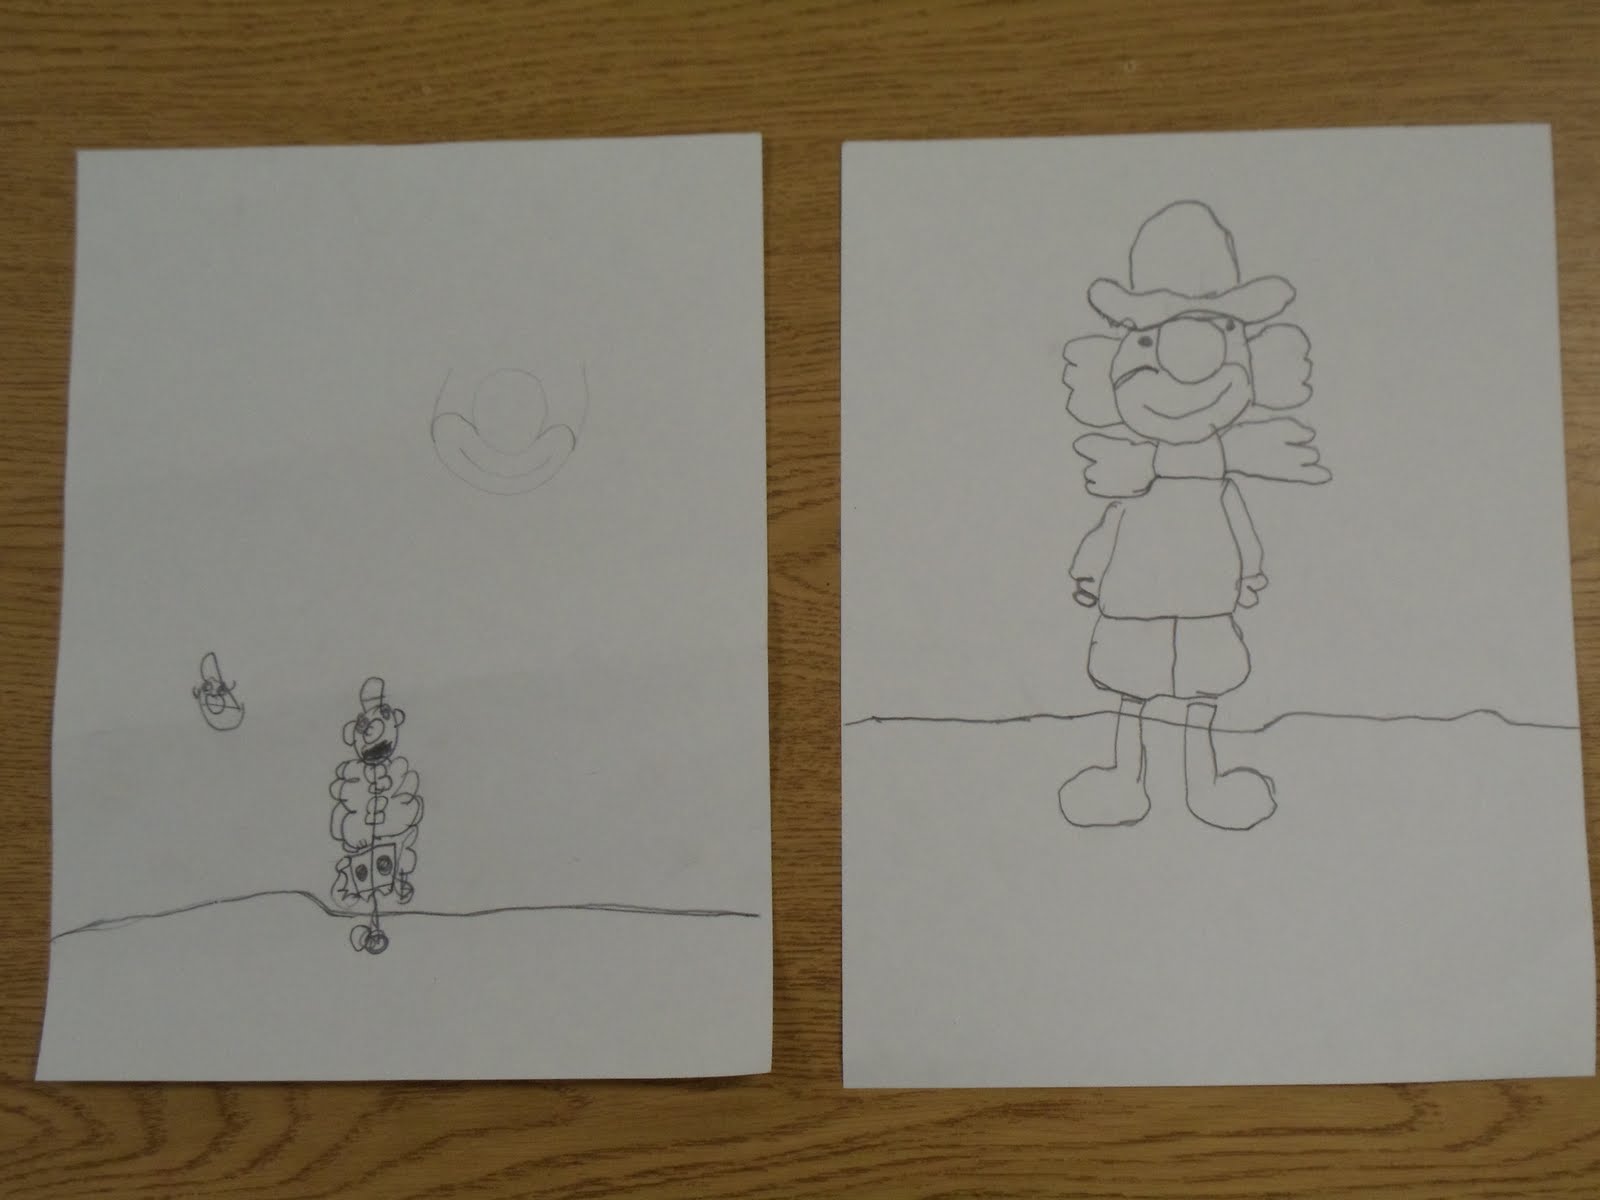
For a very few kids, I have to do the steps by drawing a dotted line for them to trace. The examples below are drawn by the same 2nd grader. On the left is her first attempt and on the right after one-on-one help. Her smile could have lit up the room as she headed back to her table to finish!


My goal is to have EVERY student successful.

Here are some of the drawings after details were added:

Check out the back of the chairs of the audience in the foreground...


Balloon in one hand & pie in the other...


A true 3-ring circus!


They can hardly wait to get them back to take home...

Sunday, January 2, 2011

Self-Portraits in the style of Jean Dubuffet

Earlier this year, I wanted something new to get across the differences in directional LINE (horizontal, vertical, diagonal) for my third graders. In the past, I used the many wonderful works of Mondrian to teach horizontal & vertical lines but as much as I LOVE the results, I was ready for a change.

I was reading through my weekly email from Art Knowledge News when I ran across an example of the work of Jean Dubuffet. His work intrigued me and his self-portrait had just what I needed!


The materials for this project are simple: 12"x18" white drawing paper, pencil and eraser along with colored markers. It's a lengthy project - at least for me as I have 45 min. classes held once a week. But the results were wonderful!


To start the project, I created a Keynote presentation/slideshow of Dubuffet's work. We discussed his use of LINE (straight, curve, angle, broken), SHAPE (organic, geometric) and COLOR (predominately black and white with a few other colors).

Following the intro discussion, we began the self-portrait using pencil. Students were instructed to draw a large oval shape with curve lines to designate neck and shoulders. To ensure that the head size was large enough for the detail work to come, I checked each drawing closely at this stage and had the students make size adjustments where needed. Next up was basic portrait proportions while referring to Dubuffet's style. So the eye, nose, mouth shapes were similar to his while reflecting the student's own facial features. Hairstyles were added along with a personal clothing/shirt choice.

Next up - using line, students divided the open SPACE to show Dubuffet's style once again. Watch closely at this point - most got carried away and needed some time for erasing.

When the pencil drawing has been assessed and corrections made, students traced all pencil lines with a black marker.

FINALLY we got to the best part: COLOR!! Following Dubuffet's example, my kids chose a limited palette - adding only 3 colors to the black (marker) and white (paper). At least that was my direction but, as usual, some got carried away and used just about all the colors in front of them! Next time, I'll eliminate the temptation so they only have their 3 color choices in front of them.

In addition to using those directional lines, they also had to BALANCE the striped areas with both solid and white spaces to show UNITY throughout their work as did Dubuffet. This was the hardest part for 3rd graders - next time we'll slow down and spend some time clarifying and modeling correct balance...

Once the drawing is complete, it's cut out and glued to a black 12"x18" background.
We packed a lot into this project and the kids were quite proud of their work when all was said and done!


As usual, students added their own unique twists to the requirements (in spite of my specific directions to the contrary, in some cases) and I loved the results (in most cases). They've given me some new ideas for next time around...There were enough excellent successes to completely fill our office bulletin board. This project is definitely a keeper!!!

More Elementary Art Blogs