Friday, May 28, 2010

Boxes, Boxes, Boxes

I don’t think there is a box I couldn’t like. It’s genetic.

My Dad was known to always have just the right size box for whatever we needed. Packing for our annual 3-week family camping/road trip was an intricate exercise that took days of preparation & a few hours to get everything to fit just right in the back of our camper!

Mom was known for improvising – why buy something new when you had something already that would work just fine? My parents’ childhoods were spent growing up during the Depression so they were the precursors to today’s ‘Reduce, Reuse and Recycle’. The perfect preparation for the life of an Art teacher, aka scavenger!

Here are a few of my favorite size boxes & how I use them.

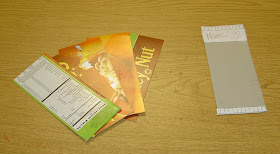
The government supplies cheese to schools in Velveeta–like boxes. They come with lids & 6 fit into a larger box – pre-made filing system for crayons, or other small items. I still have a stash even though it’s very difficult to find them these days.

I use them in the kiln room for small item storage, to sort glaze containers, and other odds & ends.


I use the cheese box upside down to keep track of X-acto knives, yarn & weaving needles.


An empty paper towel box makes a handy ‘drawer’ in my deep cabinet.


Xerox box lids make ‘in’ boxes for finished 2D work.


Empty clay boxes are being used right now for pre-cut yarn lengths during our weaving & braiding projects.


Large boxes can be lined with a plastic garbage bag and used to store greenware between classes. Just a couple of quick sprays of water & a twist to close will keep these projects moist until the next week.


How about you? Have a favorite way to reuse a box? Share!

Friday, May 21, 2010

Good Advice

Many years ago (about the time of dinosaurs), when I was student teaching I received some very good advice: The two most important people to an art teacher are the office secretary and the custodians.

The secretary KNOWS everything and the custodian can just about DO anything.

I have a wonderful & patient secretary who understands when I lose yet another form that was due yesterday (and gets me another). She’s quick to compliment the student artwork that goes up in the office (even though I should change the exhibits much more frequently). She always has a kind word and smile for me anytime I venture out of the art cave to the real world.

I currently have the BEST sweeper (janitor) on campus. I come in to a clean floor, clean tables, clean sinks and sometimes (if I’m REALLY lucky) bookshelves that have been dusted and straightened. Amazing! I make sure to let her know just how much I appreciate what she does for me on a regular basis. Our rooms get so messy & while we do our best to keep up with the worst of it, it can make a HUGE difference to have your room clean & ready the next day! When she was gone for a few days this spring on a trip…Aaugh!

I’m also blessed with a lead custodian who works hard and is so very helpful. Your custodian is your right hand man (or woman). When you have a great one, it will make your day! Mine usually gives me a heads-up when the Fire Marshal is due for the annual inspection so I can do some clear cutting of the forest in my storerooms….that alone makes him a super hero!

Bottom line: We depend on these people every day. Make sure you take the time to let them know how much they mean to you and how you appreciate what they do for you…

Monday, May 17, 2010

Woven Pouch

My third graders are beginning to complete their woven pouches. Thought you’d want to see some pix. The students chose a limited palette of 5 colors of yarn. It’s always fascinating to see how the color combinations they choose match their personalities!


The lesson was adapted from the book You Can Weave! Projects for Young Weavers written by Kathleen Monaghan and Hermon Joyner. We used the cardboard from cereal boxes to build our looms.


I have found that using a template to guide the cutting of warp spacing for the loom saves a lot of time. I used to be a purist & taught them how to use a ruler to measure the spaces. I stopped doing that when I realized we were using an entire 45 min. period just for measuring!

I color code the templates so each class has a different color - keeps me from mixing them up! Another tip I use to help speed things along is to pre-cut the yarn into 24” lengths. They really enjoyed using some of the variegated yarns I borrowed from the 4th grade braiding projects.

I’ll be teaching the woven pouch project at our state conference this fall so it’s nice to have these great examples…If you’d like the lesson plan, email me & when I write it up this summer, I’ll send you a copy!

Sunday, May 16, 2010

Invisibility Cloak

That old saying ‘Out of sight, out of mind’ is so true in my classroom. I can have the most fragile greenware pieces on a table right next to a group of energetic kinder kids but if it’s covered, they don’t bother it! If it was out in the open, it would be in pieces in no time at all.

This past week I had several things going at the same time (sound familiar?) & needed to use some counter and table space for storage at the same time another class (different media/setup) was going on. In one case, I had coil pots out on a table that needed a final ‘dip’ before moving into the kiln room. The incoming 2nd grade class was working on their God’s Eye weavings and was not known for their calm demeanor (if you know what I mean…) so this was a perfect time to get out the ‘Invisibility Cloak’!

The ‘cloak’ can vary depending on whatever is handy. In this case I just used the tablecloth protecting the table from spills. Since the plastic bread tray holding the pots only took up half the table, I just folded the other half up and over the tray. Presto change-o… Invisible!

Other times, it may be just a length of fabric. Last week we had a morning of professional development classes and another teacher was using my room for a presentation. Since my counters have the appearance of chaos most every school day, I took out 2 long yardages of fabric & laid them over the multitude of projects & boxes of stuff cluttering the counters and…Ta Dah! Invisible!

Monday, May 10, 2010

Professional Development cont’d

I wasn’t always blessed with many talented artists around me. In fact, before making the move here, most of my support came from classroom teachers.

Long before I joined my current district with all my talented colleagues, I taught in 3 small towns in Iowa. In the first position, I taught 6 months for a teacher on maternity leave and I just tried to keep my head above water since it was my first full-time teaching position. I was in a great carpool w/experienced teachers though, and they shared a lot of basic survival tips to help me along.

In my next teaching assignment, I taught in another small town with 3 elementary buildings. The art teachers met a few times to share ideas but I learned the most from a 5th grade teacher down the hall. This wonderful woman just happened to be my former 2nd grade teacher! She took me under her wing and taught me all the ins and outs of school politics, how to deal w/parents, going the extra mile for the kids who need it while being a champion for those with special needs.

In my last Iowa school, our district consisted of an elementary school, a middle school & high school all under the same roof – but different wings in the same building! Finally - I had another Art teacher nearby to bounce off ideas & share my successes/troubles with! While that was great, I continued to refine my classroom expectations & routines with the help of the classroom teachers. It was a very close, congenial group. Five of us drove to work together most every day. The 20-minute drive to and from school gave us time to share ideas & strategies. Twenty some years after my move, I still keep in touch with some of them.

At this same time, I also became involved with the Very Special Arts Festival. (“VSA Iowa promotes the creative power of Iowans of all abilities through arts experiences. VSA Iowa uses the arts to improve the capabilities of children and adults with disabilities in learning and expressing themselves. “ http://www.vsarts.org/). Through this group, I met several art teachers in the surrounding area. In addition to planning events for VSA, we also enrolled together in a ceramics class at a local art museum since we enjoyed being with each other so much!

It was all these experiences that helped shape me into the teacher I am today. I hope you take advantage of all the opportunities around you to learn from others and grow as both a teacher and an artist! Join a carpool, take a class at a local art museum, become a member of an arts group – it all adds up to a well-rounded teacher…

Friday, May 7, 2010

Professional Development

As much as I may complain about some things in my district, one thing I appreciate greatly is the amazing group of colleagues that I work with. Today, we were scheduled for ‘professional development’ all morning.

As much as I’ve learned in my 20+ years teaching art, I always look forward to learning more. When the art teachers in our district gather for PD with one of our own leading the workshop, I know I’ll walk away with new ideas or a fresh take on something I’ve done before.

Within our group, we have practicing artists in glass fusing, mixed media, watercolor, and more. We have National Board Certified Teachers. We have several close to retirement and just as many with only a few years of art teaching under their belt. The rest are somewhere in between. It’s a good mix of abilities, ages and talents.

ANYWAY… long story short: another great class. We learned ideas on how to incorporate explicit vocabulary, self-evaluation, and rubrics to our classes from one of our own (and fellow blogger), Jeane. Can hardly wait to try out the ideas & make ‘em my own! I promise to share once I have practiced…

Wednesday, May 5, 2010

Demo Table

I mentioned in the last post about my ‘demo’ table. Let me explain that a little further…

My current classroom consists of a main room shaped as long rectangle. My table setup of 8 tables is 2 tables deep by 4 tables long. Students are trained to travel down the main horizontal aisle when getting supplies, cleaning up & coming in or out of the room (more on traffic patterns in a later post).

Since my previous classroom was a HUGE square room, I struggled with where to do hands-on demos in this classroom – no room at the front & too far away from half the class to stand at either end. So after a lot of trial & error, I settled on pushing two tables together at the end of the room nearest the exit & sinks.

Students at these tables are taught early in the school year how to push the tables together quickly & carefully AFTER everyone has moved out of the way. Once tables are together & I have the materials set up, I call the students over to their assigned seats. Yep – I get to choose where they sit or stand around the demo table!! I write this seating arrangement on the back of the traditional seating chart for each class so both charts are easily accessible.

As a general rule, kids with behavior issues (you know who they are…) and those with learning difficulties sit so they have an up-close view. Those who follow directions best will stand behind those who are seated, alternating boy/girl whenever possible (unless your students are at that hormonal stage – in which case you have my deepest sympathies!)

Ideally, once you’ve taught the procedure (& practiced it a lot), everything should be ready to go in about 2-3 minutes with students in place and the demo ready to begin!

Before the demo begins, I do a quick focus activity to quiet everyone down called ‘Tap Tap’. To do this, I say “Fingers!” while holding up right & left pointer (index) fingers. Then we all begin to lightly tap dots in a circle around our ears. After checking to see that everyone is doing it correctly (and silently), it’s “Hands under the table if you’re sitting, hands at your sides if you’re standing.”

Tap Tap is a quick (about 30 secs or less!) & easy way to engage both left & right sides of the brain. When done correctly, students get quiet in order to concentrate on doing the movements correctly. As you look around your group, you’ll notice that your students who have learning difficulties struggle to get their tapping movements in synch – this is a good way to remind yourself which kids will need more help/refocusing on the day’s work…

Whenever possible, I also have a Visual Instructional Plan (learned courtesy of Tools for Teaching, The Fundamental Skills of Classroom Management by Fred Jones) that’s posted on chart paper OR whiteboard OR ActivBoard that reviews the main steps shown in the demo with simple illustrations they can follow. Those students who don’t retain info very long will really appreciate it! Eliminates a lot of “Now what do I do?”. Just point to the VIP and say “I can see you have finished step 3 so move on to Step 4” and walk away… Saves time, saves energy, and reduces frustration from those ‘hopeless handraisers’…

Monday, May 3, 2010

Wrap, Pinch, Push & Pull

Wrap, Pinch, Push & Pull

One of my current projects is a woven pouch (lesson to come soon), about the size of a credit card – just what every 3rd grader needs, right? It’s one of the many wonderful works featured in the book You Can Weave! Projects for Young Weavers written by
Kathleen Monaghan and Hermon Joyner.

One sticking point is the need to teach the process of how to thread a yarn needle because I do NOT want to be threading needles for everyone in every class (been there, done that)! So I developed a method that’s fairly simple & successful for this age group: Wrap, Pinch, Push & Pull.

Wrap: Wrap yarn in a loop around the eye of the yarn needle with thumb & forefinger, pulling tightly. (Using just the end of the yarn w/o wrapping into a loop usually ends up shredding the yarn).

Pinch: Slide yarn loop off needle. Pinch loop between thumb & forefinger so it’s almost hidden there.

Push: Push pinched yarn loop through eye of needle.

Pull: Grab the loop from other side & pull on through.
Ta Da!!

Most students get the idea on the second or third try, but those who don’t usually have a neighbor who does understand & who’s willing to help thread the needle for them so end result is…I don’t have to do it. Win – Win!

I demonstrate the process at the demo table on the first day of the weaving process (about 3rd day into project after loom building and warping loom). I show them 3 times:

1st time: I give the long descriptive version of process with emphasis on the 4 main words of Wrap, Pinch, Push & Pull

2nd time: I demo while using only the 4 words.

3rd time: I demo while students say the 4 words.

With the large population of English Language Learners in my school, I find it prudent to reduce procedural steps to one or 2 word phrases that are easy to memorize/repeat over & over. I’ll often see the kids intently threading their needles at their tables repeating “Wrap, Pinch, Push & Pull” while intently focusing on the process – woo hoo!

Sunday, May 2, 2010

Treasures

What a great time I had yesterday! Went to a new favorite store to shop - Treasures 4 Teachers - with one of my art colleagues. I picked up a my membership just last weekend. They are giving free membership to a limited number of teachers in the area who teach in a low-income district/school – 75% or more of students receiving free or reduced lunches. Since my school qualifies I was in like a bandit! Anyway, last weekend I didn’t stay long enough to shop, just wanted to grab a membership before they ran out. So today, I took my time and found some goodies…

Treasures is a non-profit run by volunteers providing low cost or free supplies to teachers through overstocks & donations. Check out their website for more info: Treasures4Teachers.org.

So my score today was: numerous bobbins of nylon thread (to be used as warp for future weavings), lots of plastic bags (for students to carry home ceramics), binders, business card magnets, rubber thingies to press into clay or print with, wallpaper book (collage, altered book covers), sheets of blank certificates (for end of the year awards) and several decks of playing cards (future artists trading cards).

They’re having a HUGE garage sale next weekend so I may have to trek back there again…